About Timatis Maps
Timatis Maps serves geographical data in the form of vector tiles conforming to the Mapbox Vector Tile Specification, enabling its users to easily publish maps on their websites.
The tiles are created from OpenStreetMap's planet data, containing a full copy of OpenStreetMap. Any rendering client that understands the Mapbox vector tile specification can be used to display the map. A popular choice is MapLibre GL JS, an open-source JavaScript library which renders maps using WebGL.
In addition information about places is available over a dedicated points of interest API. It can be used on its own or in conjuction with the base map tiles to create overlays or popups.
What are vector tiles?
Tiles encode geographical information of a certain area and are commonly used to implement interactive web maps. They come either as bitmap or vector variants.
Bitmap tiles
Bitmap tiles are essentially small raster images which are stitched together by a map viewer application to show the full map. Here is an example of a single bitmap tile:
The web map at openstreetmap.org for example uses bitmap tiles. Bitmaps contain just pixels, i.e. colour information in a grid and thus the map language and all style information is fixed.
Vector tiles
Compared to bitmap tiles, vector tiles are more flexible and styling can be applied on client side. Instead of pixel data, vector tiles are more structured, containing layers of geometric features, i.e. instructions how to draw points, lines or polygons in a coordinate system. Layers can be rendered on top of other layers enabling the creation of complex visualizations.
OpenMapTiles and MapLibre specify style schemas which describe the visual appearance of a map and Timatis Maps supports several such styles out of the box.
How do I use this?
If you have not done so yet, you may want to have a look at our examples page to explore some of the possibilities vector tiles enable. At the bottom of most pages you can find the source code.
Timatis Maps provides a no-code integration option. Alternatively, full-featured clients can be used to retrieve and display the map as well as other overlayed information.
No-code embeddings
The easiest way to get started is by using the Map-o-matic to setup the map parameters interactively. The application generates an iframe HTML tag which you can copy into your HTML page. Do not forget to replace {YOUR API KEY} with one of your API keys.
Here is a simple iframe tag example you could use right away to embed Timatis Maps into your website:
If you prefer to compose the iframe src URL yourself instead of interactively, you may want to consult the embedding reference, which describes all available parameters and format restrictions.
JavaScript clients
As mentioned above, MapLibre GL JS is a popular client library to render vector map tiles, however any client that is capable of processing vector map tiles can be used. Usually the client provides a way to configure data sources and this is where you would set a URL to our service.
Assuming for now you want to use MapLibre GL JS, you would create an HTML page like this one:
First, we include MapLibre GL JS's CSS and JavaScript. Timatis Maps hosts a copy of maplibre-gl.js and makes it available via its content-delivery network. Have a look at https://dist.timatis.com/maplibre to see the available versions. If you prefer to host maplibre-gl.js yourself or you prefer another CDN feel free to reference the files from there.
In the <script> section, the actual map is created using one of the styles supported out of the box by Timatis Maps ("osm-bright"). Make sure to replace {YOUR API KEY} with one of your API keys. If you serve this file on your web server you should be able to see the map in your web browser.
Tile endpoints
If you prefer to design your own map styles and just want to have access to the various tiles you can access them directly:
Points of interest API
The POI API is accessible over HTTPS and supports JSON and GeoJSON as data formats. The available endpoints can be found on the API documentation. Like with vector tiles, an API key is required to access the API.
The POI API supports two basic modes of operation: (1) the lookup of individual points by ID, and (2) the search for POIs matching specific classifications.
POI lookup by ID
OpenStreetMap data consists of nodes, ways and relations, each of which has a numeric ID which is unique for a given dataset and within its respective type. I.e. a node and a way may have the same numeric ID, but two nodes of a dataset may not. If the numeric ID of a node, way or relation is known, the corresponding place (if indexed by Timatis Maps) can be looked up directly, using one of the following routes:
- /api/poi/osm/node/{id}
- /api/poi/osm/way/{id}
- /api/poi/osm/rel/{id}
In addition a unified route /api/poi/osm/{id} exists. Here the numeric ID is prefixed with N- for nodes, W- for ways, and R- for relations.
Note that the vector tiles contain meta information about map features. To extract the OpenStreetMap ID of a feature, some Javascript code like the following could be used:
POI search
To find a set of POIs within some geographic area, the API offers the /api/poi/search endpoint. The search area is given either as a longitude/latitude pair (the search centre) plus radius in metres, or else as a bounding box of two coordinates, that span a rectangular region.
POIs are classified into categories like shop, accommodation, health, entertainment, etc. and most categories have sub-categories, e.g. hotel is a sub-cateogory of accommodation. Please refer to the API documentation to see the up-to-date list of categories.
Since the set of matching POIs is potentially large, the API returns the result set in pages. If another page is available, the HTTP response will contain a header next which contains a token that can be passed to the enpoint /api/poi/search/next to retrieve it. The total number of results for a single query is currently limited to 5000 POIs and each page has a limit of 500 POIs.
Here is an example that uses the search API with curl:
Your account
Using Timatis Maps requires an account. Account creation and the initial trial period is free and does not require payment information.
Account creation
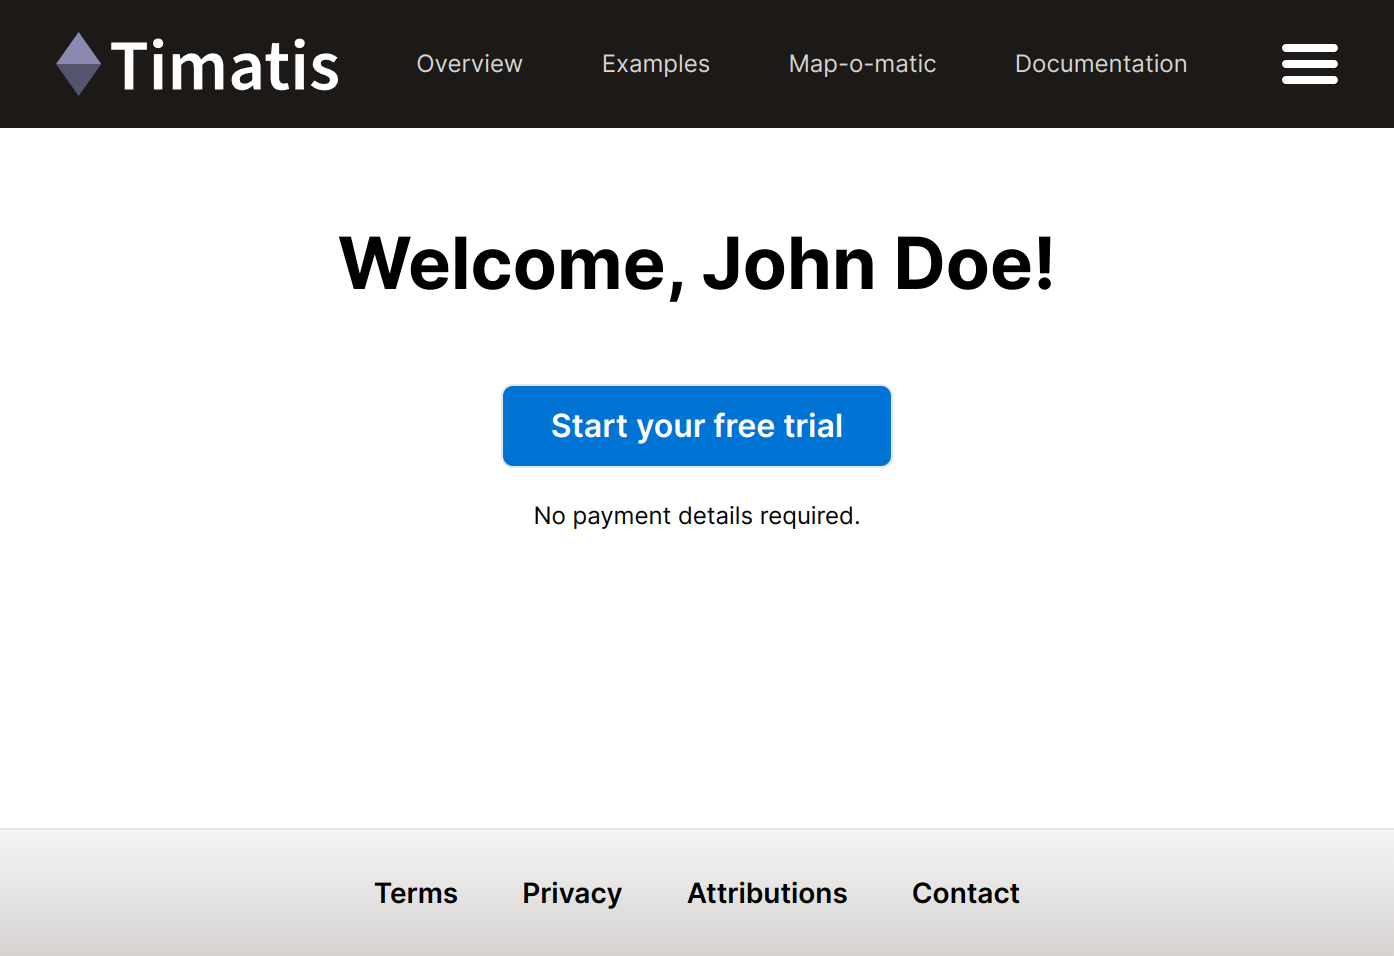
After signing in to Timatis Maps you reach your account page. If this is your first sign-in it would look like this:

Clicking the "Start your free trial" button starts your trial period. You now have 30 days to use the service for free. No action is needed to end the trial. In order to continue to use the service after the trial period ends, a subscription is required.
Account page
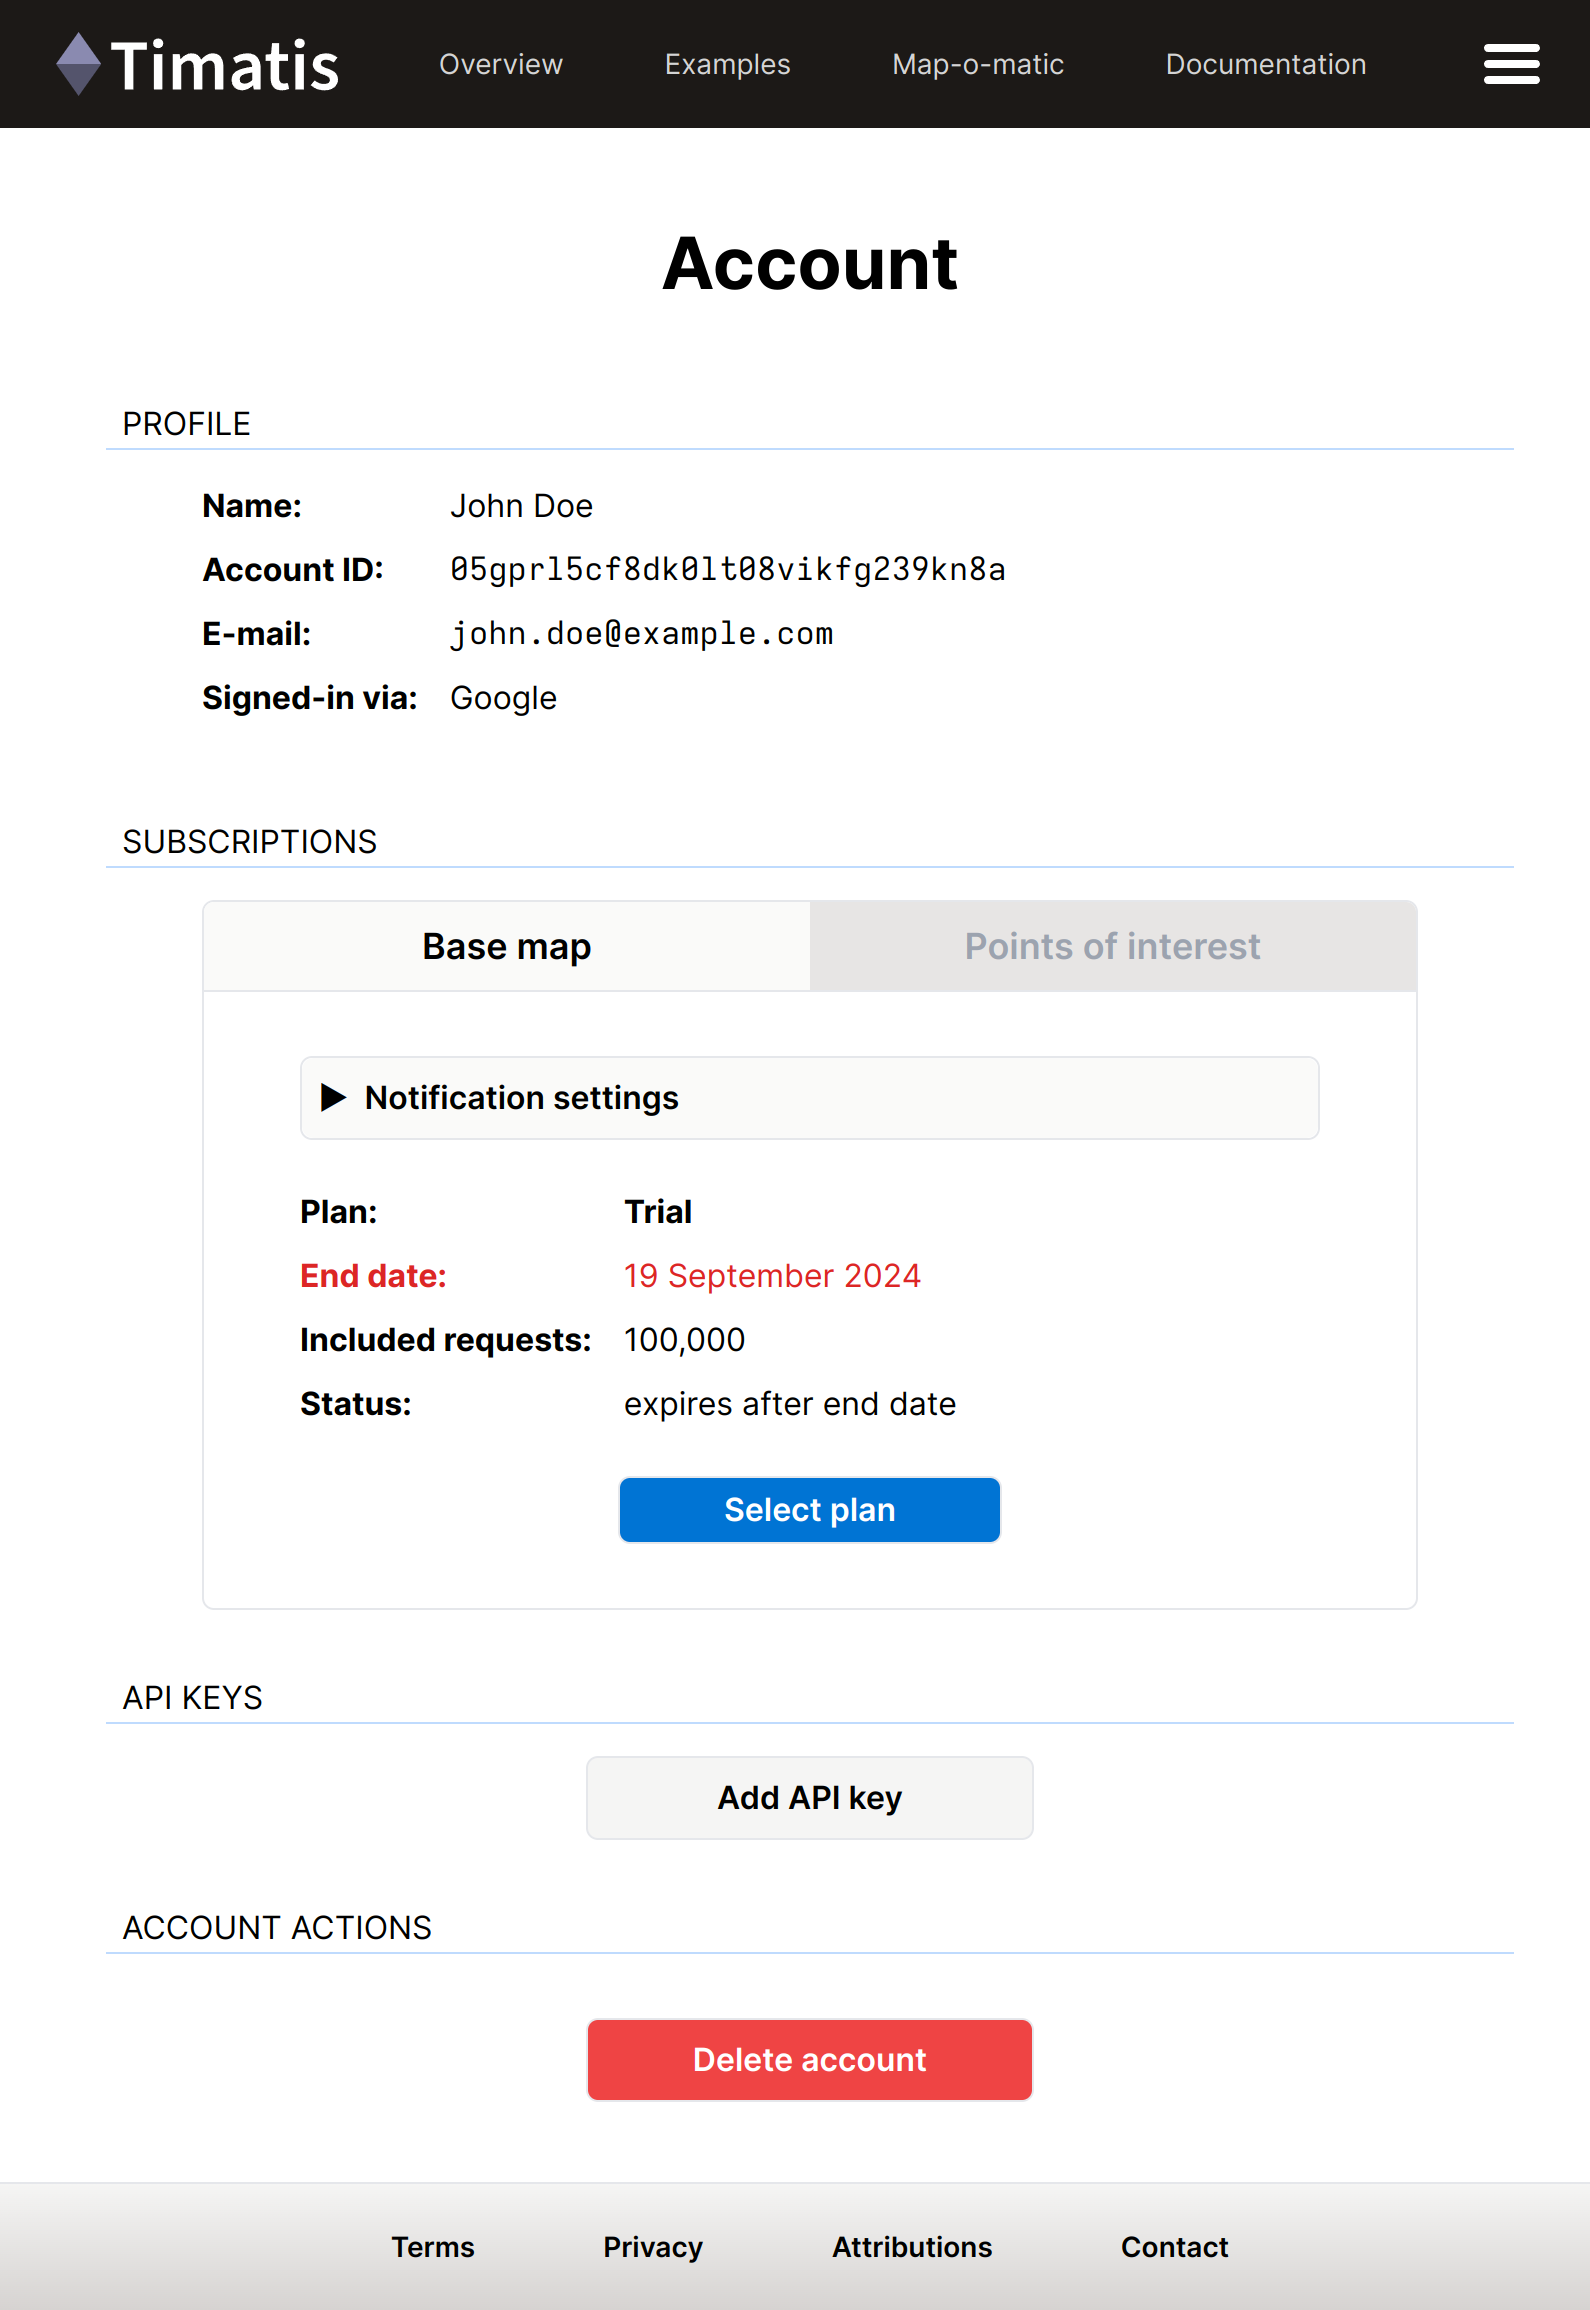
After starting the trial and on subsequent sign-ins your account page looks like this:

The PROFILE section contains some information about you, most importantly your account ID which uniquely identifies you in Timatis Maps.
The SUBSCRIPTIONS section shows your current subscriptions (e.g. "Base map"), including the request quota and the subscription status. During the trial period you can select subscription plans which you would like to continue with after the trial period ends by clicking the "Select plan" button.
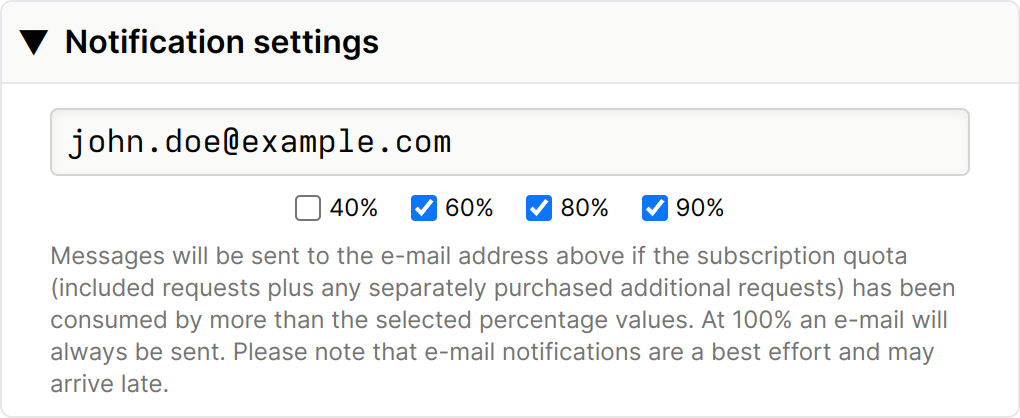
The same section also contains "Notification settings" which – when expanded – look like this:

Here you can set up e-mail notifications to monitor your request quota usage. An e-mail will always be sent when you reach 100% of your quota.
API keys
The API KEYS section on your account page lists all your current API keys. Click the "Add API key" button to generate a new, unique API key. You may have up to 3 keys in total.

The header of each entry shows the API key ID which can be copied to your clipboard by clicking the header's leftmost button. To delete an API key, click the header button on the right. A dialog will appear asking you to confirm the deletion.
Domain restrictions
To prevent unauthorized use, you can tie your API key to specific domain names using comma-separated patterns. For example, patterns can be specific domain names like example.com or wildcard patterns like *.example.com.
Please note: An API key without domain restrictions should be considered a secret and not be published.
API key scopes
API keys are scoped to subscriptions. You may use a key across all subscriptions or just a subset by deselecting the corresponding checkbox. Notice however that at least one subscription scope must be selected.
Account deletion
You can delete your account by clicking the red "Delete account" button. Any active subscriptions you may have are scheduled to be cancelled but you retain access to Timatis Maps until the end of the current billing period. You can reactivate your account after you deleted it by clicking the "Reactivate account" button which also resumes your subscriptions.
Subscriptions
A base map subscription gives you access to vector tiles, fonts, map icons and other style files. A POI subscription enables place lookups and searching for places. Subscriptions are independent of each other. Timatis Maps currently offers three plans within each subscription: S, M and L. They include different request quotas but are otherwise identical in regards to their functionality. Pricing information can be found directly on our home page.
If at some point during or after your trial period you want to subscribe to a plan you can click on the "Select plan" button in your account page. You will see the available subscription plans and their prices. Clicking on a subscription plan will direct you to a payment page hosted by Stripe Inc., our payment processor, where you can finish the transaction. When directed back to your account page, the SUBSCRIPTIONS section shows your active subscription and the renewal date.
Changing your subscription
You can upgrade or downgrade your subscriptions at any time. Changes take effect at the start of the next billing period. Your current request quota remains unchanged until then.
Click "Switch plan" to go to our customer portal, hosted by Stripe Inc., to change your subscription plan.
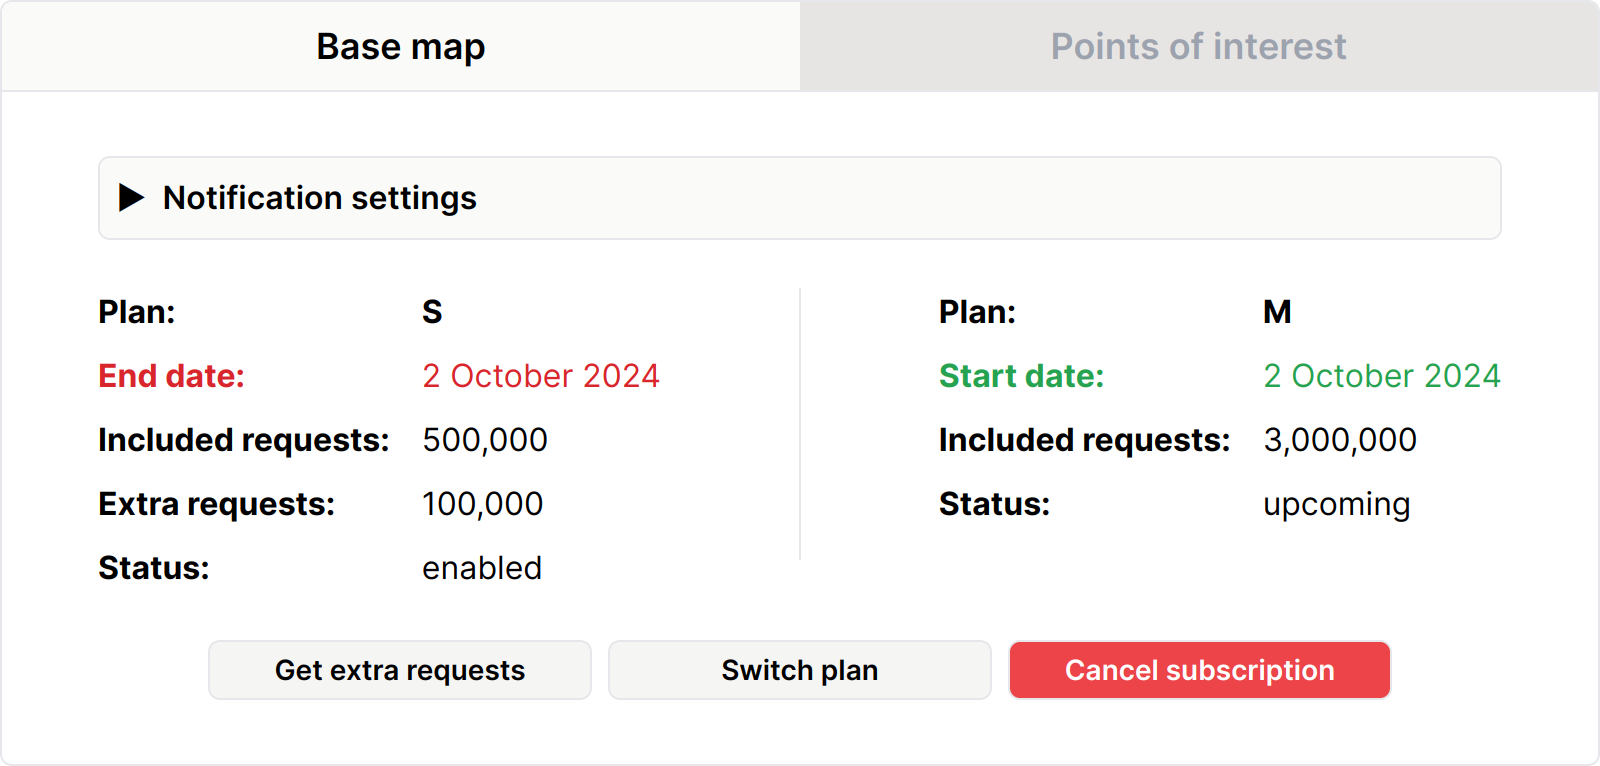
The following screenshot shows an example of a subscription upgrade from S to M scheduled for 2 October 2024:

Cancellation
You can cancel your subscriptions at any time and still retain full access until the end of the billing period. Canceled subscriptions can be resumed within this time. Click the "Cancel subscription" button of the subscription you want to cancel to visit the customer portal where you can cancel your subscription.
Additional requests
If you are close to exceeding your request quota, you can buy extra requests. These only apply to the current billing period and do not roll over. Your subscription plan is not affected. Click "Get extra requests" on your subscription tab to visit the payment page, hosted by Stripe Inc., where you can complete the transaction. When returning to your account page, the extra requests will be shown in your SUBSCRIPTIONS section.

